How to Make Milk Kefir – The Basics:
- A 500ml fido jar;
- 1 tablespoon of kefir culture;
- 3 cups of organic milk.
- Put the kefir culture in the glass jar, then fill it with fresh milk. Cover the jar with a cloth or put the lid on the jar. (If you use a lid don’t fill the jar above two thirds or use a jar with a rubber gasket that will let any pressure escape.)
- Let the contents stand at room temperature for approx. 24 hours depending on your taste. 48 hours will make a thicker, sourer kefir, 12 hours a thinner, sweeter kefir.
- The temperature will effect how quickly the culture works. So during the warm summer months the kefir will ferment faster.
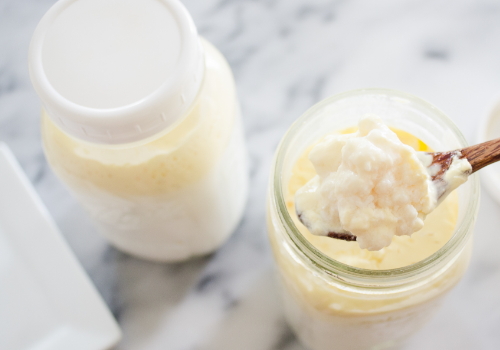
Kefir Fermenting in a Fido Jar
When it’s ready strain the kefir into a clean jar. While it’s fermenting the kefir grains will float to the top of the milk along with any cream. It’s a good idea to stir it gently with a wooden spoon to mix up the solids and liquids to make it easier to strain. Or use a wooden spoon or clean hands to scoop out the culture from the kefir (the culture is easy to feel and separate from the liquids).
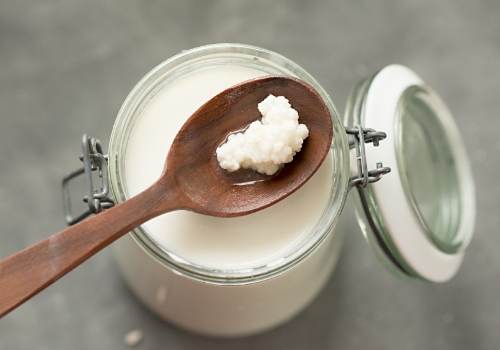
The kefir culture produces a jelly like polysaccharide substance that develops around the grains as they grow, making it look ‘gloopy’. It has unique properties and it’s own name ‘kefiran’. As you scoop out the grains you may find them coated with a gel like substance. This is the kefiran. Giving the kefir a good stir will distribute the kefiran in the kefir and it contributes to the thickness of the finished kefir. (This seems to be pretty variable, some strains producing a lot and others not much.)
After straining, the grains are placed straight back into a clean jar without washing them first. Fresh milk is added to the grains to make the next batch.
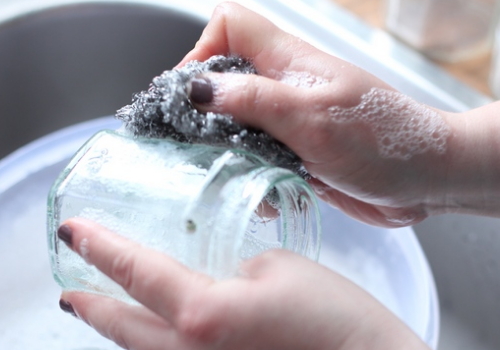
A Note on Cleanliness
Make sure everything is very clean when handling kefir. It’s a living culture, a complex system of bacteria and yeasts and you don’t want risk contaminating it. Use freshly cleaned hands, clean jars and clean non metallic implements.
Notes and variations
Making kefir is a pretty simple process, put the culture in the milk, leave it to ferment and there’s your kefir. But there are a wide variety of styles and tastes when it comes to kefir making.
For one thing, kefir is a living food and subject to a fair degree of natural variation and people have a range of tastes, so you’ll find as many different ways of making kefir as there are people making it. Here are just a few.
Timing and Temperature
There is a wide variety in the length of time the kefir is left to ferment. In the end, how long to leave it depends on how sour you like it. The longer you leave it the sourer it gets.
Some people like a lightly fermented kefir, they let it ferment for only 12 hours, others like it much stronger and more active and leave it for 2 or 3 days, past the point at which is separates into curds and whey.
Fridge Kefir
A cooler temperature slows the fermentation down and makes a thicker kefir too. Some people like to ferment their kefir in the fridge, leaving it for 5 days or more to compensate for the much slower fermentation process.
Double Fermentation
Or there’s the double fermentation technique. First ferment in the usual way by adding the culture to the milk and leaving for a period of time, 12-24 hours is the norm. Then strain out the culture and leave the kefir out to ferment more slowly for another 12-24 hours before putting it in the fridge.
Continuous Fermentation
Then there’s the traditional ‘continuous fermentation’ approach. You store your kefir in a large jar but don’t put it in the fridge. As each new batch is ready it’s added to the existing kefir in the main storage jar and then the lid goes on.
The kefir will continue to ferment (it’s a live food remember) and will get very sour and fizzy. If you feel inclined to try this you must always use a jar with a rubber seal that will allow excess pressure to escape, otherwise you run the risk of explosions!
Storing the Culture
After each batch you’ll have a few more grains as the culture grows. Eventually you’ll have quite a large batch of grains and they’ll speed up your fermentation time. Spare culture can be stored for a time in a jar in the fridge with some milk.
The fermentation will slow right down and you can store them for a few weeks this way. It’s a good idea to rotate them with the grains you’re using for your regular kefir making so that they get a chance to warm up and restore vitality to their microflora. You could also pass spare culture on to a friend.
Storing the Kefir
Store the kefir in a glass jar in the fridge. The kefir will keep a long time in the fridge. Add new batches of kefir to the storage jar as they are made and give it a shake to mix them.
This video about how to store your extra kefir grains. They will keep indefinitely in the refrigerator. You need to feed them with fresh milk every 7 to 10 days.
You can store it on the kitchen counter instead of the fridge but be aware that it will continue to ferment, although not as fast as it would with the kefir grains in it. If you want to do that you should always use jars with a rubber seal that will allow excess pressure to escape and prevent possible explosions!
It can be a very vigorous culture and has caused jars to explode when stored out of a fridge over a period of time. A kilner jar is good. The beneficial bacteria and yeasts help to prevent the kefir from spoiling but it gets very sour and fizzy. Not for the fainthearted!